Sunday, 28 November 2010

Nadolig Llawen

Here is another Nadolig Llawen card


This one was also made with one of the Nadolig Llawen papers from Free Craft Downloads

I used  paper 4
I also used one of the Christmas decoupage from  on the site as well 
I chose to use the Church twisted Pyramid 

I stuck the backing paper on to an A6 base card and trimmed it  keeping the larger piece to make another card with
I cut out and made up the twisted pyramid,  and stuck this on some bronze coloured card then stuck it  to the bottom right side of the card
To the top left of the card I stuck a Nadolig Llawen banner backed on some bronze coloured card

Friday, 26 November 2010

Nadolig Llawen Shaker Card

Nadolig Llawen


For those who don't know Nadolig Llawen is Welsh for Merry Christmas.
On Free Craft Downloads we have some Welsh Christmas Backing Papers, Inserts and Tags.

As some of you will know Welsh backing papers are hard to come by so it's great to have these

For this card I used a Blue base card
The paler Nadolig Llawen with snowman background
Snowman inverted pyramid decoupage
Some foiled holly leaves and berries
A Nadolig Llawen greeting
Small piece of acetate
Small amount of fake snow

I printed out the backing paper and the snowman decoupage  both on A5 size paper
I stuck the backing paper to the base card and trimmed the edges
I cut out the pyramid decoupage and the centres I used some foam tape to layer the first 4 layers  making sure all the edges were sealed 
I decided not to use layer 6 as the edge was quite fine so I used layer 5 as the top layer, to the back of layer 5 I stuck some acetate to the back of this layer before sticking the foam tape on
I put a small amount of fake snow inside the space of the pyramid then added the top layer 
This was then stuck in the centre of the base card and some foil holly leaves and berries were stuck to each of the four corners and the Nadolig Greeting was stuck under the decoupage

When the card is shaken it looks like it is snowing


Tuesday, 23 November 2010

Snowflake Paper Card

Luke has been very busy following in his Dad's footsteps and has made some great snowflake papers which Bob has added to the Gallery on Free Craft Downloads

Here is one of the cards I have made

 A quick and easy card to make which I hope you will agree looks nice 
I used the  Snow Flakes 9 paper
From this I cut out a diagonal strip and used 3 of the snowflakes
I used a Blue mini Dl card as a base card  and added a piece of blue ribbon down the centre
I stuck the strip of 3 snowflakes to a silver piece of card then in the centre of them I added a small blue gem 
Under the first and above the third  snowflakes I added a cream bow with a circle of very tiny beads in the centre this was then stuck on the blue base card

This is another card I made

 You can find out how it was made in the Card making Project Section on Free Craft Downloads

While I was making these cards Megan decided she would like to make one as well 
She used some embellishments and a foil Merry Christmas and  Snow Flakes 16
Here is her card


Tuesday, 9 November 2010

Change of Blog Template

Yes it is the right Blog!

Time for a change  and hopefully a change for the better

I have been thinking on and off  for a while about changing the template I used  but I couldn't find one I liked
I know there are loads and loads out there to choose from and I think that was part of the problem too much choice   there was always something I didn't like
A very good friend whose opinion I value a great deal suggested a 3 column template  I quite liked this idea but wasn't so keen on having a left and right side bar so after searching and searching most of the afternoon through hundreds I came across this one  so have decided to give it a try

Hope you all like it too 

Monday, 8 November 2010

Brewsters Christmas Card

A Christmas Card on a Card


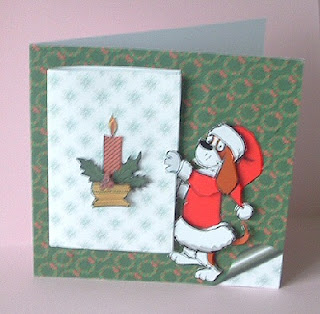
I made this card using the Brewster decoupage sheet available on Free Craft Downloads
I also used some of the older papers with it

Brewster Decoupage Sheet
Flakes 3 Backing Paper
A5 Page Curl Christmas Tree Backing Paper
Christmas Tree Decoupage
Gold Peel offs


I used an A5 white base card (Tent fold)  - In the bottom right corner I stuck a small rectangle of the flakes paper
I cut off the white edge of the page curl paper on the bottom right side
Then I stuck the Christmas tree page curl paper on the base card

I made up the Brewster decoupage and folded the card he is holding in half  then from a small piece of white paper I made an insert for it (measured to fit)
On the inside of the insert I stuck a Happy Christmas peel off and on the opposite side I stuck a gold peel off Christmas Tree I stuck the insert in the mini card

On the front of the mini card I stuck a piece of the flakes 3 backing paper and trimmed it around the edge of this I added gold fine line peel offs

I cut out and made up the Christmas Tree Decoupage, when the silicone glue was dry I went around the edges of the tree with a clear sakura gelly roll pen and stuck some small gold star peel offs  this was then stuck to the mini card

I stuck some gold corner peel offs to 3 corners of the main card (not the corner with the page curl)  then stuck Brewster with his card in the centre of the main card

In the picture below you can see the opened card that Brewster is holding 


Here is another one I made 


Monday, 1 November 2010

A New Year Card for 2011

This is an easy card to make and very handy to have a couple made up to send out to people you forgot to send a Christmas card to or unexpectedly get a card from

The papers I used to make this card are :-
2011 Template 5x7 size
new_year_08_ls  Backing Paper
new_year_08_l  Backing Paper

 I used a  graphics program to“fill in” the numbers on the template
I wanted the “backing paper” to be on the front only as well as it saving on ink 
When I was happy with it I printed it and cut out the bits inbetween the numbers
If you don’t have / use a graphics program another way to do it is to cut out the unwanted bits between the numbers then stick your chosen backing paper to the front of the card over the numbers then from the back cut around the edges and cut out the unwanted bits between the numbers


On the inside of the card I stuck the lighter backing paper and trimmed the edges You can see this showing through from the front of the card


On the inside I stuck a die cut champagne bottle and glasses
It says “Let’s Celebrate” on the bottle


 To finish off the front of the card I used some wavy edged gold peel offs to outline the numbers (they bend better than the straight ones) and put some along the bottom of the card as well


Your greeting / message can be added to the back of the card

You will find a lot more papers in the New Year section